

Cars rely on their suspension system to keep their wheels on the ground. Ground contact alone is not enough though; for your car to handle and drive well, keeping your wheels pointing in the right direction and optimally loaded is key
That’s where suspension geometry comes in.
The goal of good suspension geometry is to help you extract as much traction from your tires as possible. Without good geometry, you’re signing up for expensive suspension repairs, uneven tire wear and a generally unsafe car.
If you’re thinking of modifying the handling of your car in any way, getting the basics of suspension geometry down is the first step. You’ll know exactly what to expect from the changes you make, and you’ll be in a good position to prevent errors.
While this subject can fill an entire book, we’re going to keep it crisp and get to the good stuff right away. In this article, we’ll explain what suspension geometry is, how it affects your car, and why it does the things it does. Let’s get into it.
Automotive Suspension Geometry for Dummies
The words “suspension” and “geometry” are strung together for a reason.
The word “suspension”, originates from a Latin verb called suspendere which means “to hang up”. It is used in the automotive context because the body of every car is suspended by — you guessed it — the suspension system.
This includes your wheels, tires, struts, springs, dampers, linkages, bushings, bearings — all of it.

As you probably know, geometry is a branch of mathematics that studies the sizes, shapes, positions, angles, and dimensions of things.
Put them together and you have suspension geometry. It can be defined as:
The geometric arrangement of all the components in a suspension system, and the values of all lengths and angles within it.
In simpler words, suspension geometry involves:
- Positioning and angular movement of your suspension components and,
- The effect this has on the movement of your wheels and tires.
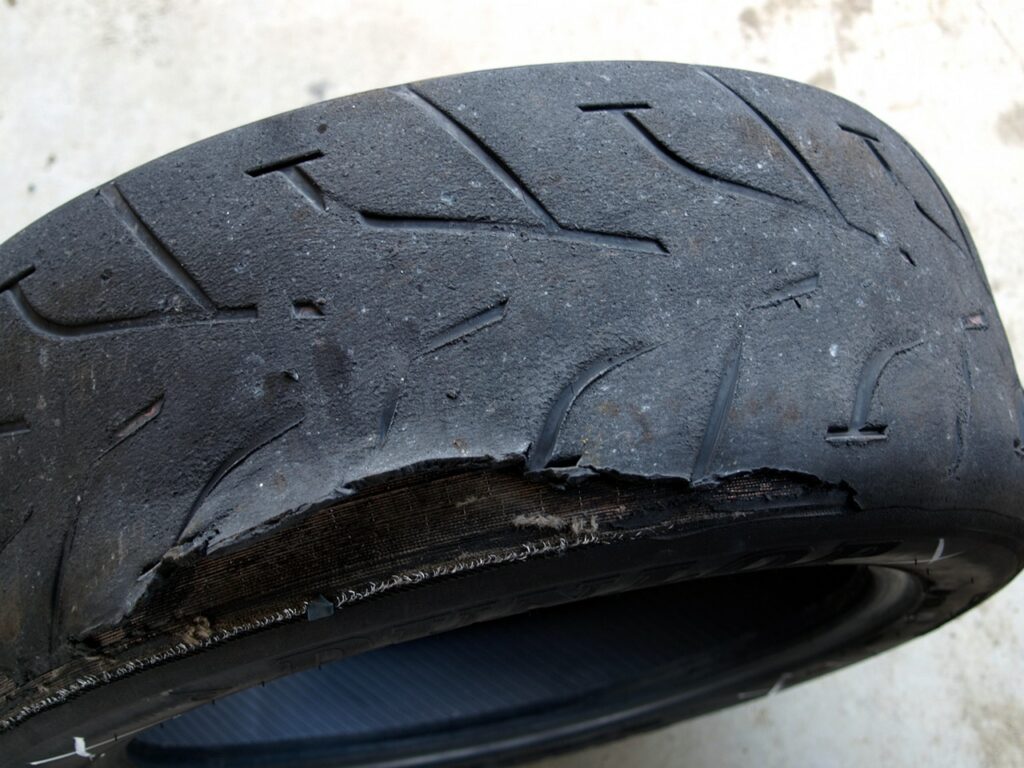
If your car’s suspension geometry is off, it’s going to be extremely noticeable. Telltale signs include simple but expensive problems like uneven tire wear — and that’s if you’re lucky. It could get as bad as your car not being able to drive even in a straight line.
Here’s a list of everything that can go wrong if your car’s suspension geometry is not set up correctly:
- Uneven tire wear
- Prematurely worn out suspension components
- Unpredictable oversteer and understeer characteristics
- A harsh ride
- Unresponsive or overly responsive steering feedback
Effects of Suspension Geometry On Ride & Handling
Suspension geometry plays a vital role when it comes to designing the ride and handling of a car. Manufacturers get it right by fine-tuning the placement of suspension components depending on what’s expected out of the car; where it’s supposed to be driven, etc.
The whole point of having good geometry is to extract the most amount of grip and control out of your tires in all possible conditions. Whether it’s hard cornering, braking, driving over bad roads, or driving with a heavy load, your tires need to be used at their maximum potential at all times.
With bad geometry, even the stickiest rubber at the perfect race-day tire pressure, paired with the best suspension system in the world won’t help — your car will still drive poorly.
Static vs Dynamic Geometry
Suspension geometry needs to be thought of in two ways; static (referring to what’s stationary) and dynamic (that which is under constant change).
The interaction between the geometric variables of your suspension system becomes 10x more important when you move from a static environment like being still in a parking lot, to a dynamic environment like turning or driving over speed bumps.
Because your suspension components are all closely interlinked and work in unison at all times, the smallest change in any angle or measurement will cause a domino effect and impact multiple areas of your entire suspension system — effectively altering your car’s handling.
For example, something as simple as turning your steering wheel will cause your wheels to gain or lose a tiny amount of camber.
Knowing stuff like this will make it a lot easier for you to understand why some handling mods work and why some don’t, which brings us to the next topic.
Handling Upgrades and Altered Suspension Geometry
Common wisdom suggests that the geometry of your suspension should not be changed unless you’re trying to achieve a very specific result. You’ll be surprised how easily your suspension geometry can get unintentionally altered with modifications like:
- Low or negative wheel offsets
- Wheel spacers
- Lowering springs that don’t match your OEM dampers
- Lowering your ride height a little more than you should
- Suspension swapped in from another car

Don’t get us wrong, we aren’t saying that you shouldn’t modify the handling of your car. Installing these modifications is great, they’re going to be the first step towards getting your car to handle the way you want.
If you really want to dial your setup to its max potential and do it the correct way, you must consider your overall suspension geometry.
If you’re new to the subject, you’re going to have to do a lot of research; feel free to ask questions at your next car meet, dig into automotive forums, read informative articles like this one, and pick your mechanic’s brain if you have to — but get it done. You won’t regret it.
So, if you’re making any suspension related modifications to your car, it’s important to be mindful of the changes they’re going to bring about.
Another thing to note is that suspension setups are never “perfect”. The changes you’ll make are going to have advantages and disadvantages. The best practice is to make sure that the benefits outweigh the penalties for your use case.
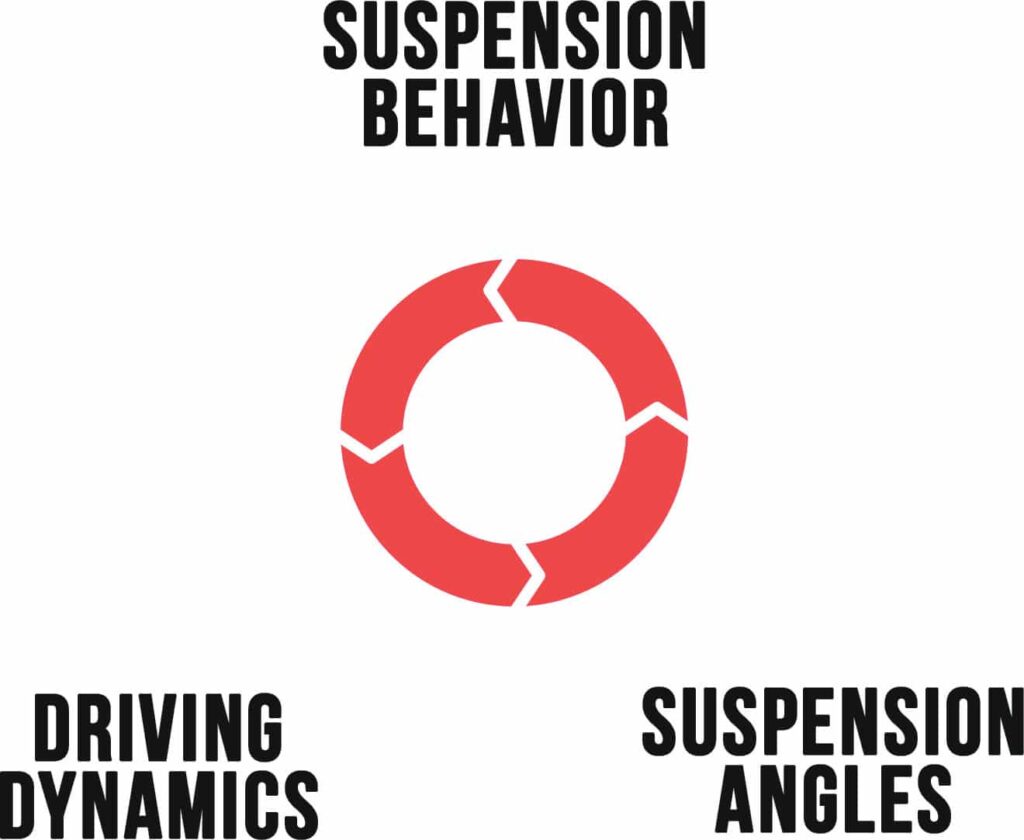
Suspension Behavior
Your car’s suspension system is never idle, it adapts to whatever you throw at it. Every time you turn, brake, or accelerate, it loads and unloads different areas of your car’s platform. This is called weight transfer — the key component of automotive suspension dynamics.
You’ve definitely experienced body roll while turning, suspension dive (being pushed forward) when braking, and suspension squat (being pushed into your seat) under hard acceleration. All of this suspension behavior takes place because of weight transfer.
To better understand suspension geometry, let’s look at how your suspension system behaves when you’re driving, and why it does what it does.
Body Roll
Whenever your car goes through a corner, due to inertia, it’s body rolls towards the outside of the corner if you turn left, the body rolls towards the right and vice versa.

To understand why body roll occurs, it helps to know two important concepts:
- Roll center, and
- Center of gravity
The center of gravity of any car is the central point at which its average mass is summed up. In simpler words, it’s like a balance point at which the entire weight of the car is evenly displaced.
Cars with a low center of gravity feel like they’re planted to the pavement while those with a higher center of gravity feel less stable.
Roll center, on the other hand, is an imaginary point about which your car rolls from side to side. Picture your car from either the front or rear view, and visualize an imaginary vertical line in its center. When the car body rolls from side to side, it’s going to do so around a pivot point, like a see-saw.
The closer your roll center is to your center of gravity, the less body roll you’ll experience. The further these two points are, the more body roll you’ll experience. However, if both these points intersect, there won’t be any body roll. In theory at least.
It goes without saying that if the positioning of either of these points changes, your car’s handling changes too.

While you can’t change the center of gravity of your car unless you go for an engine swap and shift a lot of weight around, it’s quite possible to change the roll center by readjusting your control arms.
Body Pitch: Squat & Dive
If you floor the throttle in your car, especially if it’s rear-wheel drive, you’ll experience that the rear end of your car gets pushed downward, and the front end lifts up.
When this happens, the rear springs compress and the front springs decompress because of lateral weight transfer. This is known as acceleration induced squat.
Suspension dive, on the other hand, happens under hard braking — it’s the exact opposite effect. Because of weight transfer, the front end of your car dips down while the rear end lifts up as you get on the brakes.
Suspension squat and dive are a result of body pitch. Just like how body roll is a shift in your car’s weight from side to side, pitch is a shift in weight from front to back.

In suspension geometry and behavior, pitch center is pretty similar to roll center, except you’re looking at the car from the side view.
Suspension Angles
Now that you know what suspension geometry does, let’s look at the “why” part of the equation.
To understand why suspension geometry affects your car’s overall behavior, you need to understand suspension angles like camber, caster, toe, scrub radius, and steering axis inclination.
You’ve definitely heard these terms being thrown around a lot. Knowing what they mean will help you to predict what a particular handling upgrade will do to your car.
Your car’s suspension angles constantly change according to your driving dynamics. It works like a cycle — suspension angles change > suspension behavior is altered > car’s driving dynamics get altered, and the pattern goes on.
For example, your car is designed to be driven at stock ride height only. When you lower it a little more than you should, you get unwanted negative camber which reduces your grip in high-speed corners. This calls for measures of correction to mitigate the effects of unwanted negative camber.
The most important suspension angles include…
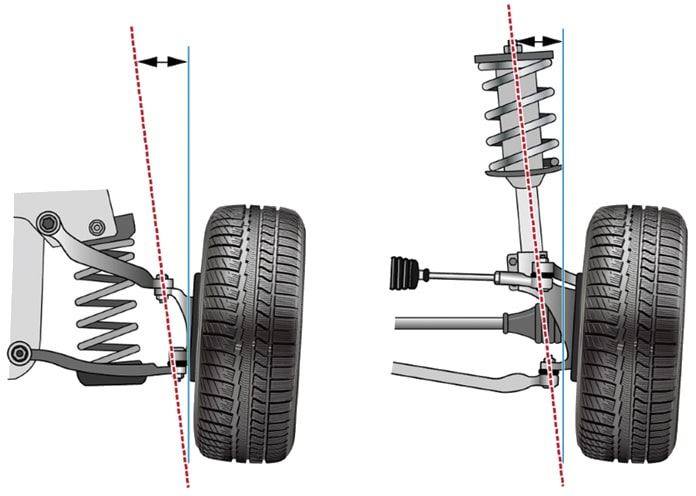
Steering Axis Inclination (King Pin Inclination)
In the most simple form, the steering axis is an imaginary line along which your entire wheel pivots when you turn. This line passes through the two ball joints where your wheel mounts to your steering knuckle.
Inclination refers to how diagonal the steering axis is relative to the vertical axis when viewed from the front of the car. It can be adjusted by moving the upper ball joint laterally, towards or away from the center of the car.
To see this in action, park your car on a smooth surface, and have someone else operate the steering wheel while you watch your tires turn. Look closely and you’ll notice that your tires never turn about a perfectly vertical axis. If they did, your scrub radius would increase so much that your car would be difficult to turn.
What Does KPI Do?
King pin inclination allows us to alter the scrub radius in a way that suits the car. Even a small change can directly impact your camber and caster and even the entire geometry of your suspension.
The more positive KPI you have, the more steering feedback and stability you’re going to get.
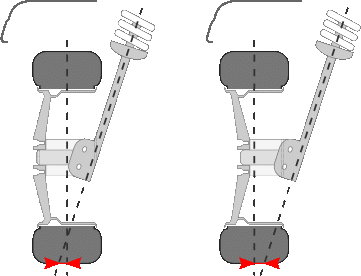
Scrub Radius
When you turn your steering wheel, the tire wants to pivot around the point where the KPI meets the road surface. However, if the centerline of your tire is laterally offset/away from that point, the tire is going to have to “scrub” through a small patch on the road.
The surface area of this patch that we speak of is your actual scrub radius. It is the distance between the point where the steering axis meets the road vs the point where the tire centerline meets the road.
Effects of Scrub Radius
The first thing you’ll notice is that scrub radius increases steering weight when the car is stationary. When it’s moving, however, the weight felt on the steering wheel is more caster-dominant.
More importantly, scrub radius affects the dynamic toe characteristics of your vehicle which causes a change in high-speed cornering and braking stability.
During braking, if the braking effort is more on one side of the vehicle, having a positive scrub radius will cause the vehicle to swerve towards the side where there’s more traction. Negative scrub radius in the same situation will cause the vehicle to swerve towards the side where there’s less traction. This happens because of torque steer.
This is why it’s really important to marry all four of your tires, brake pads, and rotors in a way that they have the same amount of life left. That way every tire will have the same amount of traction and braking force at all times. The same reason applies when you upgrade to low offset rims. By changing your rim offset, you’re directly impacting the scrub radius.
Caster
Caster is the suspension angle responsible for the self-aligning effect you feel every time you let go of the steering wheel after exiting a corner. It severely impacts how your car’s steering feels.
That’s why when you get out of a turn, get on the throttle and let the steering wheel go, it finds its way back to the center.
If you were to spin out unintentionally or initiate a drift, you’ll find that the caster angle tries to stabilize the car by itself, without the need for any steering input.
The more caster you add, the heavier your steering will feel.
Caster directly affects the camber angle, causing it to change when you steer. By increasing caster, you can run less camber when going in a straight line, and get more, much-needed camber in the corners. This is great for reducing tire wear.
You’re probably reading this while sitting on a rolling/revolving chair. Take a closer look at one of its wheels and you’ll see that their steering axis is actually in front of the contact patch. This is why the wheels will follow the direction of your chair. Something similar happens with cars; the caster angle always points the steering wheel in the direction in which you’re moving in.
The Relationship Between KPI, Caster, and Scrub Radius
Caster and king pin inclination both essentially measure the same thing but from a different angle. KPI measures the angle of your steering axis when viewed from the front, while caster measures how far forward or behind the steering axis sits in comparison to the vertical axis when viewed from the side.
To adjust KPI, and scrub radius as a result, you’d have to move the upper ball joint/strut sideways, either towards or away from the center of your car. To adjust the caster, however, the movement of the upper ball joint / strut would have to be either towards or away from your headlights. That is, either front or back.
- KPI: Steering axis measured laterally (from the front view).
- Caster: Steering axis measured longitudinally (from the side view). This impacts the distance between the point where your steering axis meets the road surface and the tire contact patch
- Scrub Radius: Distance between the point where the steering axis meets the road surface and the tire contact patch.
There are two ways of measuring the distance between your tire contact patch and the point where your steering axis meets the road surface:
- Measured Longitudinally (side view) = Caster Angle
- Measured Laterally (front view) = Scrub Radius
Positive and Negative Caster
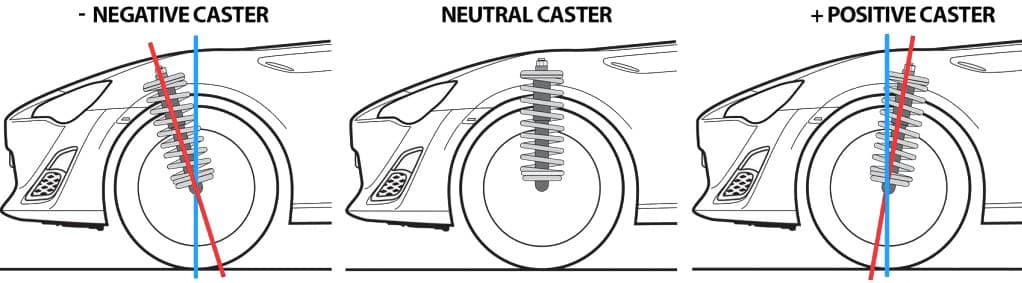
If you move the top of the steering axis towards the back of the car, that’s called positive caster, and when you move it towards the front of the car, that’s called positive caster.
Negative caster is rarely used in production cars; positive caster however is something that most cars have, and without it, they’d be really difficult to drive.
Camber
To better understand camber, look at your car from the front view and focus on the tires. If the top of both tires is tilted away from the car, that’s positive camber, and if it’s tilted towards the car, that’s negative camber.
Race cars use negative camber and they do this to maximize grip during high-speed corners. You see, when cars bank into tight corners at high speeds, their inside wheels have little to no load on them while the outside wheels carry most of the weight.
When this happens, the outside wheels fold over and lose some of the much-needed tire-road contact areas. To keep the contact patch as flat as possible, negative camber is needed.
Most unintended suspension geometry changes occur because of adjustments to camber angles. It is arguably the most sensitive suspension angle and needs to be taken into account before doing almost anything to your car’s handling.
Toe
Toe angle refers to the direction your tires are pointing in when you’re looking at them from the top view. It can change depending on whether your car is accelerating or decelerating.
- Tires Pointing Straight: Zero Toe
- Tires Pointing Inward: Positive Toe
- Tires Pointing Outward: Negative Toe
Toe angles can be influenced by the forces acting on your tire, depending on whether you’re accelerating or decelerating.

Certain toe angles can make your car more stable while some can have the exact opposite effect. For most cars, a little bit of toe-in on the front wheels really helps. But if your rear tires have toe-out, it can cause your car to spin out at every corner.
Ideal Suspension Geometry for Different Applications
When setting up suspension geometry and wheel alignment, the “one size fits all” approach won’t work. Each car has different weight distribution, a different chassis, and a different way of delivering power.
Besides that, every form of motorsport has its own unique requirements. Even the driver’s personal preferences play a massive role in deciding the final settings. There are simply too many variables at play. While we can’t pinpoint the best geometry style for you, we can point you in the right direction.
Drift
Drifting requires completely different suspension alignment settings as compared to what you see on street and circuit cars.
Circuit cars are designed to go straight and turn fast, but purpose built drift cars are designed to go fast sideways. What works on a circuit car won’t necessarily work on a drift car.
The general misconception with drifting is that it’s all form over function, but that’s far from the truth. Put a pro drifter behind the wheels of a capable drift missile and it’ll keep up with the circuit car all day. This is thanks to purpose-built components that help you achieve the kind of geometry needed for drifting and being able to alter it whenever you want.
Here are some of the most commonly used suspension settings on drift cars.

Negative Camber
When drifting, the contact patch between the tire and the road ultimately defines how much grip you’re going to have and how the car is going to handle. Running some amount of negative camber on your drift car will allow you to have a wider contact patch at full lock.
This is critical for getting the most out of your car’s performance. Done correctly, you’ll be able to carry a good amount of speed into your drift, and you’ll be able to control your slip angle a lot better.
You will generally see the following camber settings on a drift car:
- Front-wheel camber: -3° to -4°
- Rear-wheel camber: No more than -1 degree; it’s best to stay as close to zero as possible
More Caster
Caster is one of the most important suspension geometry angles in the world of drifting because of the self-aligning effect it has on the wheels. The ideal thing to do is to run as much positive caster as you can without causing contact between tire and fender. Rolling fenders is an option that allows much more steering lock.
If you’ve spent any time drifting, you’ll know that once you initiate a drift, you’re going to need to countersteer. You can do this by letting the steering wheel go when you’re at the tipping point. When you do this, your caster angle will cause the wheels to align themselves by countersteering for you.
Some drifters love this quality, others find it intrusive. You can change your caster angle to dial in the perfect setting. The more positive caster you add, the heavier your steering will be. Just keep in mind that your car may snap more aggressively.
6° is a good starting point when dialing in caster.
Increased Steering Lock Angle
Steering lock refers to the maximum angular range of your steered wheels. For example, cars with a lower steering lock angle will have a wider turning radius and vice versa.
When it comes to drifting, a steering lock is essential for the driver to be able to control the slip angle without spinning out. Getting something like this out of a production car that’s not designed for it requires a few modifications.

The most commonly used method to get there is something called the “cut and shut knuckle”. This involves cutting your spindle down and moving the steering rack forward to achieve the steering lock you’re after.
This technique is old, but tried and true. As it progressed over the years, drifters started experimenting with methods like using longer lower control arms to achieve the optimal steering lock.
Front Toe Out
Using a bit of toe-out at the front will help you to make your initiation snappier and your transitions a lot smoother. However, having too much toe-out in the front will make your car more unpredictable to handle.
A ¼ inch of toe-out up front is typical on purpose built drift cars.
Rear Toe In
There’s a lot of misinformation out there regarding rear toe-in on drift cars. Many beginner drifters try to tune the balance of the car by adjusting the rear toe. This is not the best thing to do as too much rear toe-in will cause your car to instantly straighten up mid-drift if you let go of the throttle.
It’s better to use other aspects of your suspension to fine-tune your car’s drifting-behavior. This includes stuff like changing the stiffness of your sway bars, experimenting with different spring rates, damper adjustments to name a few.
On the other hand, using even the slightest amount of toe-out at the rear will make your car twitchy. You’ll probably want less toe-in at the rear. ⅛th of an inch is a good place to start.
Drag
In the world of drag racing, there’s only one thing more important than making power — getting that power to the ground. If your dragster can successfully put down all its horses without wheelieing, that’s half the battle won.
The suspension setup commonly seen on drag cars is unfamiliar to those who don’t know these cars. But it’s important to remember that they are built to do one thing and one thing only; go fast in a straight line.
Ideally, you want your drag car to be as light as you can get it, and then find a way to make it hook and go down the track. The front of the car must stay down, and the rear end must go up slightly as the tire digs into the track, crushing its sidewalls.

Below are the key features that make these things happen…
Rear Anti Squat
Every car has a center of gravity. As it accelerates, the center of gravity lifts due to suspension squat. The whole idea with rear anti-squat is to dilute this effect by changing where the power is pushing the car.
Adding anti-squat to the rear reduces the amount of compression seen on the rear springs. By using the right amount of anti-squat, you’re getting the best of both worlds; less weight transfer and more traction.
Another major benefit of having more anti-squat at the rear is the reduced probability of wheelies as the rear end of the car pushes up slightly rather than squatting down.
For drag cars, we recommend having anywhere between 140% to 180% anti-squat on smooth pavement with heavy rebound valving.
Front Shock Sag
The way a car puts power down, it’s overall suspension geometry, and weight transfer can all be affected by your front shock settings. The goal with this is to optimize weight transfer to the rear end of the car to achieve more traction and to make better use of the car’s wheelie-preventing anti-squat characteristics.
Having some amount of stored energy in your front shocks and springs is key. Your front suspension setup must allow for 30% to 35% sag when the car is stationary.
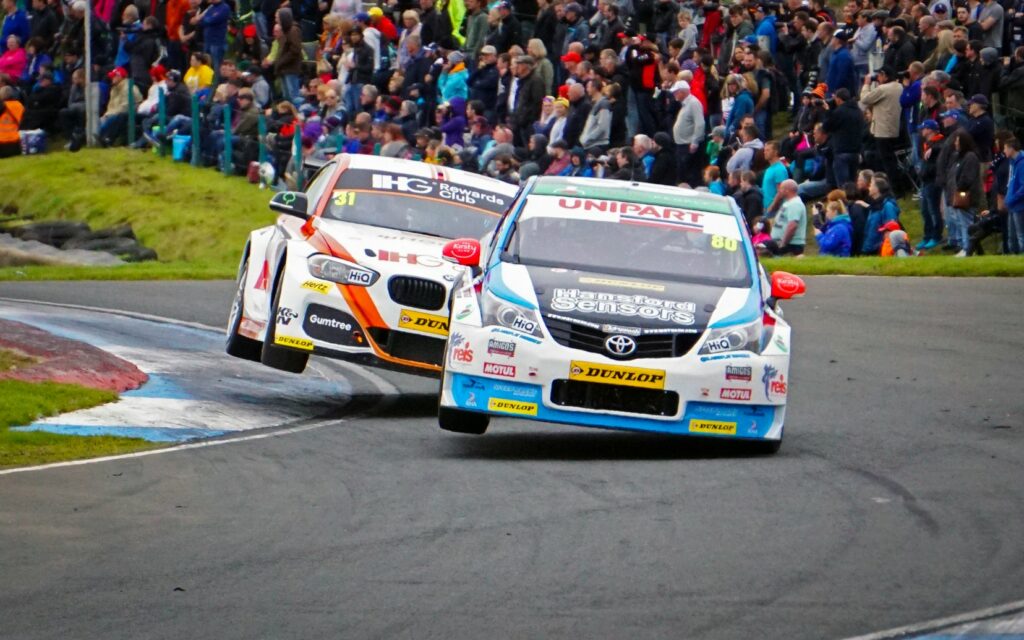
Circuit/Race Car
Circuit racing puts cars to the ultimate test. There needs to be a perfect balance between all parameters of your suspension geometry, including the width of your tires, so that your car can go around the track in the shortest possible time.
Below are the suspension geometry parameters for a circuit or race car. At the first glance, they might look similar to that of drift cars but remember that the numbers will vary quite a lot.

Negative Camber
We’re sure that by now you know how significant camber is when it comes to having a flat contact patch while banking hard into a corner. It gives your car maximum traction when it needs it the most.
However, overdo it and you’ll lose straight-line grip and stability. Circuit cars often run a more conservative -2° to -3° of camber, but obviously there are lots of variables here.
Toe
Adjusting your toe settings just right will allow you to fine-tune your car’s handling in a way that wasn’t possible before. Doing this has a noticeable effect on how a car handles around corners.
Different cars require different toe settings — depending on whether you’re driving an AWD, RWD, or FWD car, where the engine is mounted, and its overall weight distribution.
Toe settings are really easy to alter by yourself. Here are a few ballpark adjustments that will help you to get started with setting up your toe for the track.
Front Toe-Out
Toe out at the front can be very useful as long as it is used in the right amount. It makes the steering response sharper and reduces understeer when entering a corner. With too much toe-out at the front, however, the car will be unstable in a straight line and will refuse to turn when you need it to.
Front toe-out is generally more suitable for FWD and AWD cars as it helps to counter their natural tendency to toe in under hard acceleration.
Front Toe-In
Front toe-in helps out with straight line stability but it slows down the steering response. It’s best used in mid and rear engine RWD cars in small amounts. Use too much and you’ll find your steering input extremely sluggish and you’ll swerve under hard braking. A lot of this comes down to driver preference though.
Rear Toe-In
Toe-in at the rear is ideal for stability. It can help an RWD car to throttle out of a corner much harder and sooner. It makes oversteer feel more manageable.
Caster
Race cars use higher amounts of caster since it makes the front wheels gain camber while turning. This allows racing teams to run static camber for straight-line grip, and rely on the dynamic camber gain while cornering. The result? A flat contact patch at all times!
Positive Scrub Radius
Positive scrub radius helps to maintain steering feel — an important thing to have when you’re driving a race car. It also complements your caster and amplifies the self-steering effect.
Here are some good starting points:
- RWD: Between ¾th of an inch to 3 inches
- AWD and FWD: <2 inches
Suspension Geometry Setup: Our Verdict
If you’ve made it to the end of this article, congrats, because now you know more about suspension geometry and its corrections than many other car enthusiasts out there. Spread the word, and modify responsibly!
Remember that every action has a reaction — it’s all about knowing what to change, and by how much.
Is there any particular topic that you’d like us to cover next? If yes, leave us a comment below!
4 comments
Thanks for this very detailed explanation. I knew some aspects, but this is a bit mindboggling. I am thinking of lowering an MX-30 Mazda electric. Because it now looks likes its on stilts. I doubt how much to lower it. The springs from H&R are progressive and can be fitted on standard shocks. Lowers 35/40mm F/R. Since I want to replace the wheels & tires also (car now has 5 colors : metal gloss wheels, black plastic “4×4″ wheelarches, red body, greyish A/C pillars and roof edges, black roof..). Want to stay with 18” -gloss black- to keep some comfort, but slightly wider track ( + 3cm per axle ). Also change to all season Quatrac Pro Vredenstein tires. Do I have to have the alignment/caster adjusted to keep steering ‘factory’ ? I assume all kind of sensors for dynamic stability & braking get confused if its too much “off” factory setting ?
Good morning
if i have a 17×7″ wheel with 37.5 offset , and i go to a 17×7.5 wheel with 40 offset
will this upset my front end geometry ?
While installing aftermarket suspension kit, do the upper and lower control arms need to be on the same exact pivot axis?
My RWD brand new stock car has an SAI angle is specified Min. 10°24′ and Max. 11°24′. However, the actual value of SAI is not even 10° and its steering is not stable even on a straightline road.
I investigate further with a finding that it came with a lower wheel offset (ET30) where generally Japanese passenger cars come with wheel offset between ET40 to ET50.
If 10°54 is equal to Zero Scrub and 10°24 is Positive Scrub (5mm), is 9°54′ equal to at least 10mm of Scrub Radius?
What is the SAI tendency of RWD vehicle after “lowered”, does it naturally go to Positive Scrub or Negative Scrub?