

Camber is arguably the most DIY-friendly suspension angle thanks to purpose-built products that allow for easy adjustability.
But it’s not as simple as installing camber plates and making adjustments right away — there’s a ton of preparation and calculation involved.
That said, you don’t have to be an expert to adjust your car’s camber angle. Anyone who’s mechanically inclined can do this at home with the right tools and some creativity.
There are a bunch of different approaches you can take along with many different tools to choose from.
The most challenging bit is getting your car on a level surface and ensuring that your wheels can turn freely while they’re fully loaded — this is crucial for getting the right measurements.
In this article, we’ll discuss how to adjust camber at home, how to prepare your car for the work, and we’ll list some of the equipment you’re going to need.
Setting Up Your Car and Garage
Consistency is the name of the game when it comes to getting accurate readings. There are some things you need to do to ensure that your measurement tools can give you reliable data:
- Make sure that your car is seated on a perfectly level platform.
- Get your car corner balanced.
You need to make sure your car is loaded and parked on a level surface. Most garage floors aren’t perfectly level, but there are ways you can go around this problem.
You could do one of the following:
- Get your garage floor levelled professionally (an expensive option).
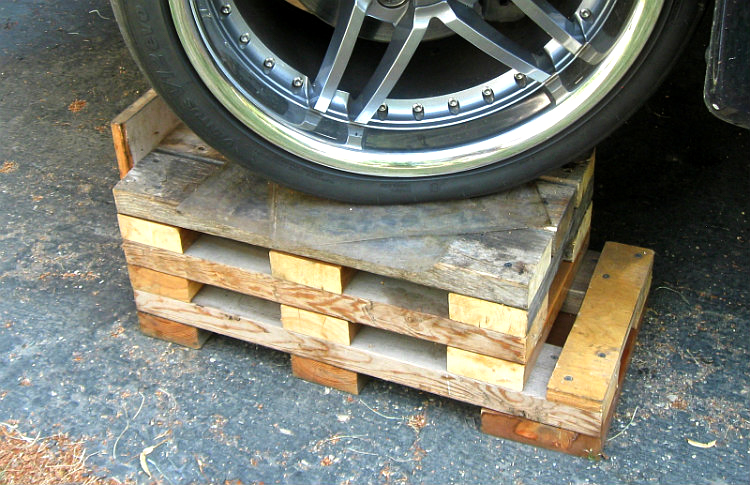
- Fabricate a perfectly-levelled platform (with turn plates) for your car to sit on. This can be done with the help of:
- Wooden planks for the platform’s body,
- Linoleum blocks to make turn plates,
- Grease for use between the linoleum blocks,
- A laser leveling gauge for measuring individual wheel height, and
- Metal sheets for making shims which can be used to raise wheel height as required.
- Fabricate a wooden platform for your car. Place a digital level-gauge on the same plane where your tire will sit and zero it out (use the angle correction feature) before measuring your camber.
Measuring Camber

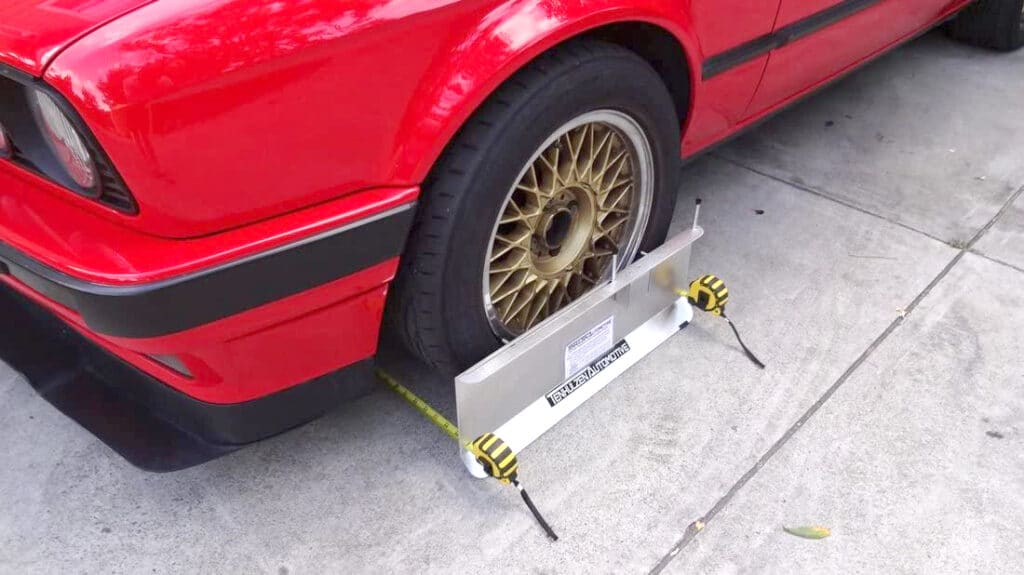
Once your car is on a level platform and fully loaded on turn plates, you can proceed to measure your static camber. Remember to be safe and cautious — always lock your main brakes (not just your parking brake).
To measure your camber, you can either use a spirit level gauge for an analog read-out, a digital gauge for ease of use, or a tire temperature gauge if you’re out on a track.
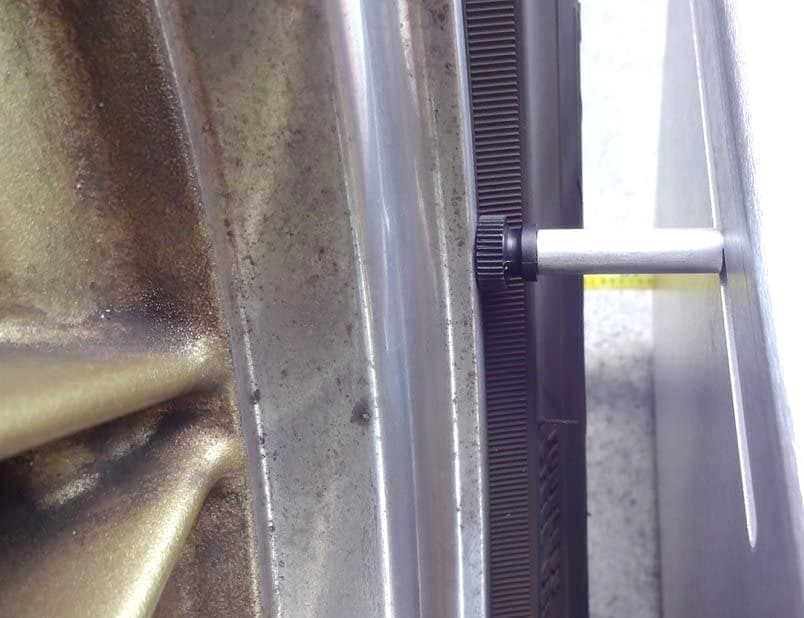
Whether you use a digital gauge or a spirit level gauge, you’re going to need something that sits flush with your rims and reads the angle of your wheels. This can be done with:
- A straight edge placed vertically on the wheel. Depending on the length of your straight edge, it might or might not come in contact with your tire sidewalls — this is undesirable because you want it to be in contact with your rims and not the bulging tire sidewalls.
- A specialized clamp tool (inclinometer) that functions like a straight edge but has protruding arms that lock on to the top and bottom lip of the rim. Many tools that have this sort of functionality also have an in-built digital camber/caster gauge.
There are various types of camber gauges available on the market, and you can also make one yourself for very little money.
Spirit Level Gauge
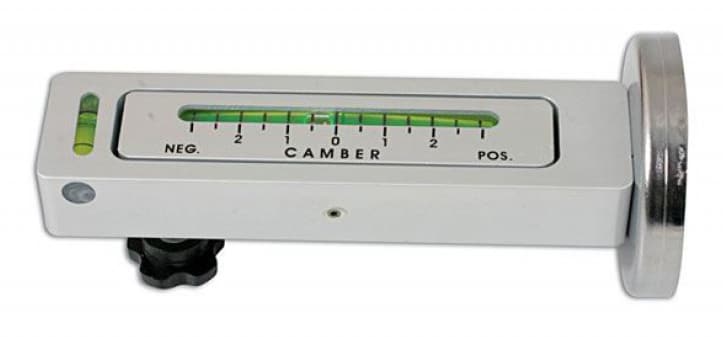
Spirit bubble camber gauges have some obvious advantages over digital gauges. They don’t require any calibration, they’re cheap, and they’re easy to use. The only problem is that you pretty much have to be on a level surface.
With some higher-end digital gauges, you can get away with not being on a perfectly level surface because they correct for the angle of the surface they’re placed on via a calibration process.
Assuming that you’ve prepared your car and your garage using the steps outlined above, here’s how you can use a spirit level gauge to measure camber:
- Install the clamp tool on your rim. Make sure it’s secured in place tightly and doesn’t move around.
- Attach the spirit level camber gauge to the center of the clamp tool.
- Note down your measurements.
Digital Gauge / Inclinometer
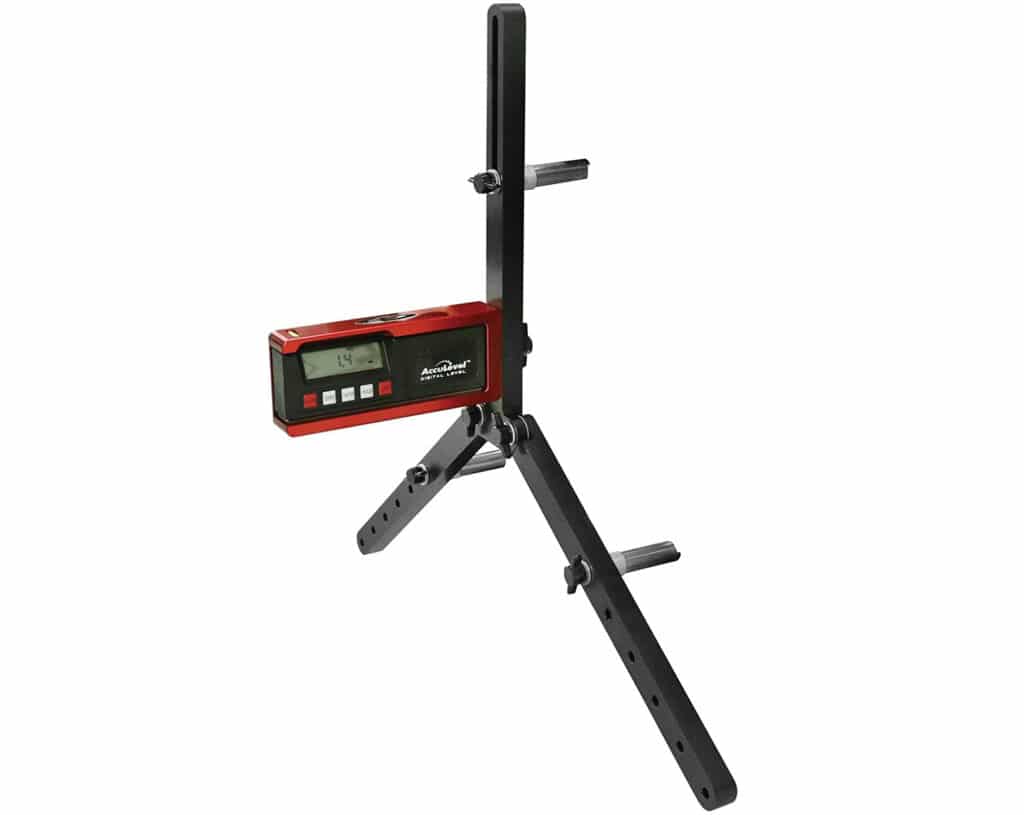
Even though digital camber gauges don’t require your car to be on a level surface, they need to be calibrated properly before you can trust the readings.
To measure your camber digitally, follow the same steps as you would with a spirit bubble, but use a digital camber gauge instead.
Alternatively, you can use a clamp tool (inclinometer) that has an in-built digital gauge. Our favorite options include:
Pyrometer

If you’re out on the track and need a quick way to tell if your camber needs realignment, we recommend using a pyrometer (a thermometer for your tires).
This is a tool that resembles a multimeter, it comes with a cable that has a spike connected at the end. The spike can be used to pierce the tire and get an accurate temperature reading.
If you’re wondering how camber and tire temperature are linked, know that camber adjustments are typically used to maximize traction when cornering. That’s what it all boils down to.
Unlike caster and toe, camber has less to do with steering balance and straight-line stability.
Uneven temperature or wear across your tires is a tell-tale sign of improper distribution of pressure or grip. It’s very important to have an optimal temperature spread across your tires.
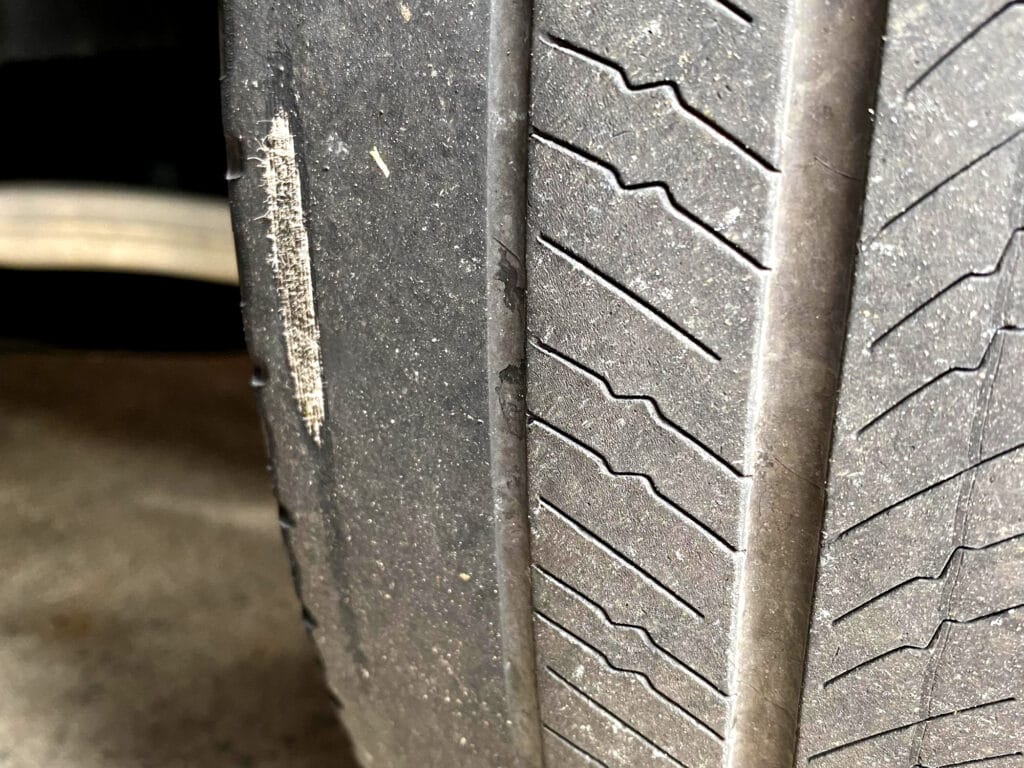
For example, if the outer section of your tire is a lot warmer than the inner section, that’s an indication that you need to add more negative camber. But if the opposite is true, then it means that you’re already running too much negative camber.
Aim for temperatures in the optimum operating range of the tire. For most high-performance street tires it’s 160 to 220 degrees Fahrenheit.
How To Adjust Camber Angle
Adjusting camber involves changing the mounting position of the top of your strut and/or how your steering knuckle mounts to the bottom of your strut. This can be done by using camber plates, camber bolts, eccentric bolts, or adjustable control arms.
The amount of adjustability you get depends on what car you drive and how you’ve modified it. But more importantly, it depends on the type of suspension system that’s installed on your car.
Most OEM suspension systems offer limited camber adjustability through eccentric bolts, turn-buckle joints, or shims. Turn-buckle joints are usually seen on rear multi-link set-ups but are also found on front wishbone suspensions.
For MacPherson strut and double wishbone style suspension systems, camber plates and eccentric bolts are most common. Here’s how much adjustability you can expect from these two components:
- Camber Plates: Allow 2° to 3° of camber settings
- Camber Bolts: Allow up to 1.5° of adjustment
For anything more than this, you’re going to need adjustable control arms because changing the length of your control arms gives you the most amount of adjustability.
Camber Bolts
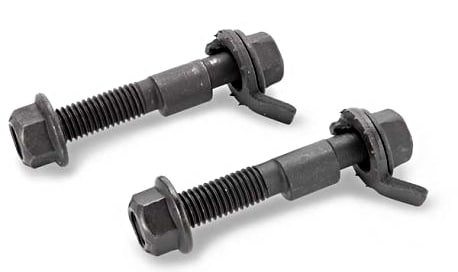
Camber bolts are often seen on production cars but they allow a very small range of adjustment. What makes these work is an offset washer along with an eccentric lobe — a bulge on the bolt that vaguely resembles a camshaft lobe.
When you turn the bolt, the bulge affects the horizontal alignment of your steering knuckle or control arms which impacts the camber angle.
Most production cars have adjustable camber bolts from the factory. However, you can always use aftermarket bolts for a slightly wider range of adjustability.
If your car has a MacPherson strut suspension, you’ll notice that it uses two mounting points. You have the option of running aftermarket bolts in both spindle holes for maximum camber gain.
For double-wishbone suspensions, the best way to adjust camber is by replacing one of the OEM control arms with those that are adjustable. By adjusting the length of your control arms, you can influence the angle of your steering knuckle, and change camber as a result.
However, camber bolts can be used on double-wishbone suspensions to move the upper or lower control arms.
To use camber bolts, start by sourcing the right ones for your car. If your car already has these installed from the factory, you can skip that step entirely and proceed to make the adjustments right away.
The swap is pretty straightforward, but dialing in the right camber settings is a little complicated.
Here’s how to replace and adjust your camber bolts (MacPherson strut):
- Place your car on your levelled wheel alignment rack, install your camber measuring tool of choice, and make sure the main brakes are locked.
- Get underneath the car — using a breaker bar or an impact gun along with a socket, loosen both the top and bottom bolts that hold the strut and the knuckle together.
- You can either replace both the lower and upper OEM bolts with camber bolts or just one.
- When installing the new camber bolt, it’s important that you read the instructions and align the washers correctly. Every camber bolt requires different methods or orientation.
- Make sure the second bolt is loose enough to allow adjustment. Once you have your camber bolt in place, tighten it with a hand wrench. You don’t want it to be too tight because that will prevent you from adjusting the camber angle properly.
- Now comes the tricky part. Monitor your inclinometer, gently turn the bolt (not the nut) to change camber. Once you reach the desired angle, hold the bolt in place, and torque down the nut from the other side without letting the angle change.
Camber Plates
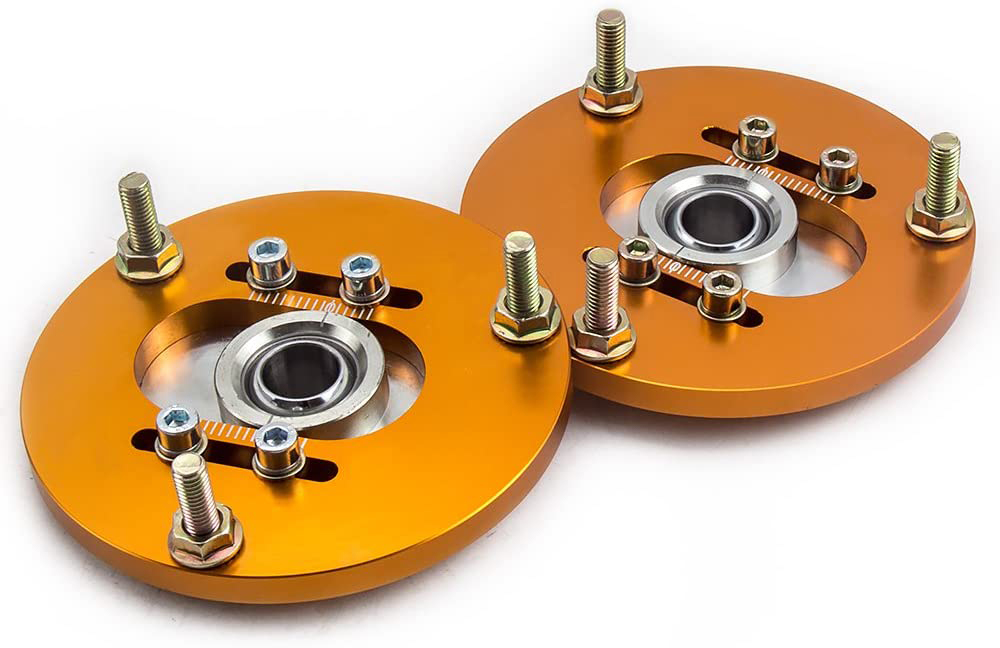
Unlike camber bolts, camber plates allow for a much wider range of adjustment, and they’re commonly paired with coilover-fitted MacPherson strut suspensions.
The idea is to replace your fixed strut top mounts with those that are adjustable. That way you can make your coilovers lean towards or away from the vehicle.
So if you’re wondering how to adjust camber on coilovers, that’s one way to do it. You’ll even find some higher-end options are sold along with camber plates.
Leaning your coilovers towards your car will add negative camber and leaning them away from the car will add positive camber. For this to make perfect sense, you’re going to want to know the difference between positive and negative camber.
Making adjustments with camber plates is significantly easier than fiddling around with camber bolts. All you need is an Allen wrench. Easily accessible adjustment hardware is another advantage.

Here’s how to install and adjust camber plates:
- Start by jacking the car up, if your car is lowered, use a low profile floor jack.
- Loosen all components that keep the strut bolted on to the car. These include wheel hubs, knuckle mounts, sway bar links, radius rods, etc.
- Unbolt the top mount and remove the strut assembly.
- With the strut out, use spring compressors to compress and detach the coil spring from the top mount.
- Once the top mount is removed, the rest is straightforward. Simply install the camber plates and reconnect the top nut.
- Reinstall the strut assembly and all suspension components. You’re now ready to adjust the camber.
- Mount your car on a level platform with spin plates.
- Use an allen wrench and loosen the 4 bolts on the camber plates. Using the printed index, slide the bolts to your desired angle. Retighten the bolts and you’re done.
Note that the functionality and features of camber adjustment products vary from brand to brand.
Adjustable Control Arms
The best way to adjust camber is by changing the length of your control arms. OEM suspension arms are usually rigid and don’t offer any adjustability.
That’s where adjustable control arms come in. This upgrade is compatible across various different types of suspension systems and is arguably the most effective way to adjust your camber angle.
Adjustable control arms replace the standard fixed-length arm and can be adjusted in length. This is possible thanks to threaded collars and/or adjustable rose joints. This functionality works slightly differently on A-arms and other types of control arms, but the result is the same.
Adjustable Camber Bushings

Camber or alignment bushings are something you’ll see very frequently on trucks and off-road vehicles in general. Just like camber bolts, adjustable bushings feature an offset design that allows for minute levels of camber adjustment.
They’re ideal for perfecting your camber angle. It’s more of a touch-up rather than a primary solution. For a more comprehensive adjustment, we recommend using camber plates or adjustable control arms.
Front and Rear Camber Adjustment
The methods outlined for adjusting camber apply to both front and rear wheels. In principle, you’ll be following the exact same method to measure your front and rear camber.
But when it comes to adjusting the front and rear camber, the steps involved won’t necessarily be the same. Because suspension systems differ from car to car, it’s difficult to zero down on one universal adjustment method.
Most camber kits available on the market have everything you need to adjust your front and rear camber angles. You’re going to want to understand what type of suspension systems you have in the front and rear, and then make a judgment call on which is the best way to adjust camber.
As mentioned above, camber plates and bolts work flawlessly with MacPherson struts, and adjustable control arms are the way to go when it comes to double-wishbone or independent multi-link type systems.
Final Thoughts

It’s important to know that when you make any modifications to your suspension, it completely upsets the suspension geometry. This means your camber, caster, and toe might need realignment. Not only does this dramatically impact how your car steers, but it also impacts how it brakes, accelerates, and corners.
This is most common on lowered cars. When you lower your car without taking into account the unintended camber gain, it won’t drive right. Knowing your way around basic DIY wheel alignment will help you mitigate a lot of the unwanted problems that come with modifying your car’s suspension.
Practise is the name of the game when it comes to wheel alignment. You probably won’t reach alignment shop-level accuracy in your garage, but you can get quite close for not a lot of money.
Whether you drive an economy car, a drift missile, a show car, or a track car, having these skills up your sleeve will pay off in the long run.
What’s your preferred method for adjusting camber? Let us know in the comments below!