So you just spent a bunch of money on brand new wheels and you cannot wait to have them fitted. This is a great time to slow down and figure out how you’re going to go about the installation.
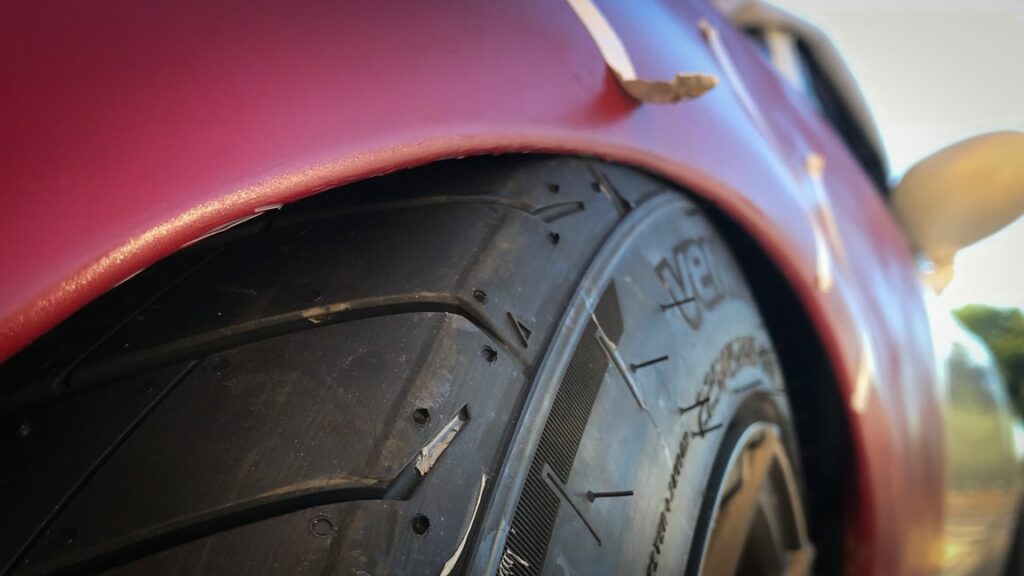
Before you install your new wheels and start driving, it is important to check if they clear the inner lip of your fenders. If there’s no clearance, you need to get them rolled.
Why roll fenders you ask? Well if there isn’t enough clearance and you drive anyway, you’re going to get some gnarly scratches on your tire sidewalls or even worse – your shiny new rims.
Fortunately, there are ways to go about this problem rather easily. All you need is an entire afternoon, a few tools and some patience.
In this guide, we’ll explain how you can reshape your fenders in a way that will eliminate any wheel rubbing issues.
What Is Fender Rolling & How It Helps
Most car bodies aren’t designed to accommodate larger wheels than what they come with. That’s why running into fender clearance issues is common if you’re lowering your car or getting a larger set of wheels and tires.
Fender rolling AKA guard rolling is a process where you heat and reshape your fenders in a way that will prevent your tires from coming in contact with them.

Most commonly it is the fender lip that needs to be folded up. If you take a closer look at your fenders, you’ll notice that the lip forms an “L” shape. The goal here is to roll it up in a “U” shape to get rid of it’s sharp edge.
Doing this will not only keep your new wheels safe, it will also make your setup look clean and well fitted.
How to Roll Fenders at Home
If you’re wondering how to roll fenders properly and whether or not it can be done at home, the answer will surprise you.
Fender rolling can easily be done either at home or at a shop. However if you’re like us and love working on your own car, this DIY fender rolling project is going to be very rewarding.
Rolling your fenders at home is easy as long as you don’t rush it. With some intuition, patience, and the right tools, you’ll have the flush looking fitment you always wanted.
This entire process will require between 4 to 6 hours or more the first time you do it, depending on whether or not you run into complications. That said, it’s best to spare an entire day for this project.
Here’s everything you need to know before you get started with the fender rolling process.
Tools
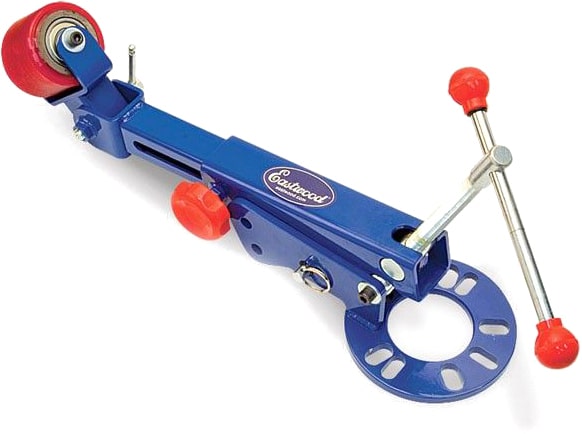
Reshaping any metallic object requires heat and a molding tool. When it comes to fenders, all you need is a heat gun and a fender roller.
While you can also use a baseball bat to roll your fenders, we recommend using a tool that is designed specifically for this purpose. The tool in question here is a fender roller.
Eastwood is a company known for making the best fender roller on the market. You’ll also find similar Chinese variants of the same tool for about half the price. You get what you pay for though. The Eastwood fender roller is far easier to work with and is totally worth the premium.
If you’re concerned about how to use a fender roller and whether or not it requires a professional hand, don’t worry. There is a learning curve but it gets really easy once you get the hang of it.
Here’s a list of all the tools you’ll need to roll your fenders properly:
- Heat gun
- Fender roller
- Floor jack
- Rags and an old toothbrush or scrubbing brush

Preparation
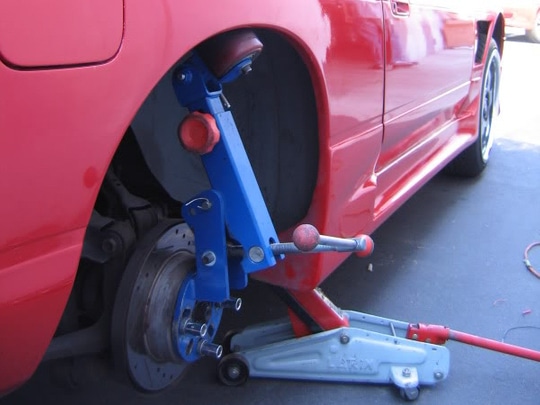
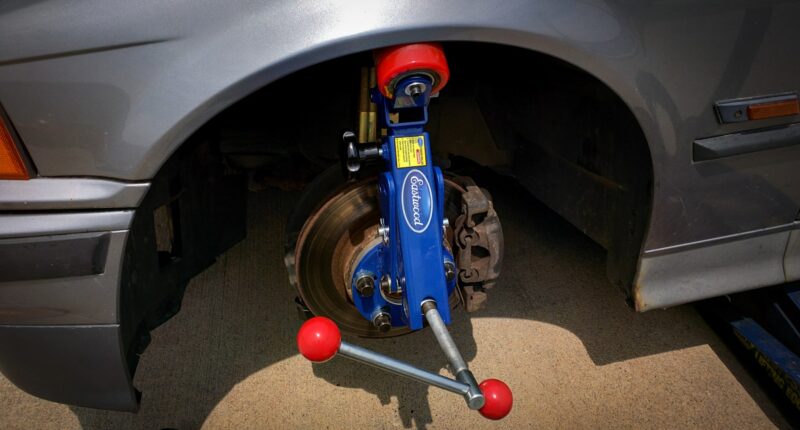
First things first – jack the car up with its handbrake engaged. Proceed to take one of the wheels off and install your fender roller in its place.
Once the fender roller is installed, release the handbrake and leave your car in neutral.
Remove any plastic clips that might be holding the plastic fender liner to your fender, and pop your liner out so you have access to the lip.
With a rag or a toothbrush, clean out all the gunk that might have accumulated behind the fender lip. If your car is particularly dirty, a quality degreaser will help here.
If you are simply rolling the lip of your fenders, once you are done cleaning, tuck your plastic liner back up underneath the lip.
Tip: Before you get rolling, it is good practise to make a small cut right above the part where your fender meets the bumper. In most cars, there’s usually a chunk of metal sticking out around here which makes it difficult to shape the fender properly.
You also can easily grind off this entire metal bit. Doing this is helpful especially if you’re running wider, low or even negative offset wheels.
Technique
If you’re wondering how to roll fenders with a fender roller, the following section will
explain how.
Your first step is to angle the roller in a way that it pushes the fender lip up and not (yet) out. Do note that the roller doesn’t need to be bolted on too tightly. A snug fit will do just fine.

Here’s where you’re going to have to heat the fender lip. The main reason why we use heat is that it makes the metal easier to shape. Even the paint becomes slightly stretchable which allows you to roll your fenders without cracking your paint.
Here are some must-know heat gun tips:
- Make sure to not hold the heat gun in the same spot for too long – doing this will certainly overheat the paint, causing it to bubble.
- Keep the heat gun at an optimal distance – not too close, not too far.
- Heat the entire fender lip evenly to a point where you cannot touch it for more than half a second. (This depends on the quality of your fender metal and paint).

Now that the fender lip is heated, you’re all ready to roll.
The most important thing to remember while rolling your fenders is to go slow and to do it gradually. Place one hand on the tension lever and the other under the roller with a firm grip.
With the roller arm at a right angle (facing up) start rotating it from left to right like a pendulum till the fender lip starts folding up. As the lip folds more and more, you’re going to have to readjust the angle and tension of the roller. Doing this will allow for a tight and neatly folded fender lip.
Make sure you get an even fold across the entire curvature of your fender. We cannot stress enough on how important it is to go slow — a few inches with every roll.
Do remember that the fender lip is going to start cooling off a few minutes after being heated. With that in mind, It’s a good idea to keep track of how hot the metal is so that you can heat it again when required.
Fender Pulling vs Rolling
If you’re spending big bucks on a new wheel setup, they better look great, right? To achieve the hellaflush look, simply rolling your fenders won’t get you there.

To make sure that your wheels don’t have rubbing issues and look amazing at the same time, you’re going to want to pull your fenders after rolling them.
If you’re wondering how to pull fenders; “pulling”, in this context refers to literally pulling your fenders outward, making them wider. This makes room for much wider wheels.
To do this correctly, you need to place the roller tool in a way that pushes the folded fender lip out, towards you. You’ll have to readjust the angle and tension of your fender roller before you start pulling the process.
If you notice that your tire only rubs against a small patch of your fender, it’s a smart idea to heat and pull it only where needed.
The best way to check if you’ve successfully eliminated wheel rub is to recreate the bottom out effect with your wheel bolted on.
Simply remove your OEM struts or coilovers, place a floor jack under the suspension arm and install your wheel. Once this is done, you can push the wheel up and steer it both ways to test if you have any rubbing issues even with the wheel maxed out.
Repeat this entire process for every wheel and you’re all set to drive safely, without any fender rubbing issues.

Precautions for Fender Rolling
Patience, consistent heating, and not using excessive force are without a doubt, the most important aspects of the fender rolling process.
Picture this — you’re in a hurry and so, you’ve unevenly heated the fender lip and now you’re applying a lot of pressure, trying to bend it into your desired shape.
By doing this, you’re putting your entire quarter panel at risk. Many enthusiasts have reported seeing unexpected warps, dents and even cracking body filler after rolling their fenders.
If this happens, you’re going to have to spend money on additional bodywork which defeats the purpose of rolling your fenders at home.
With all this said, it goes without saying that this DIY project demands patience. Anyone who’s wondering how to roll fenders properly at home must begin the process only after understanding it thoroughly. Doing this will give you a fantastic end result and reduce any chances of error.
If you are planning to run your wheel fitment with exceptionally tight tolerances, it’s probably a good idea to use dynamic wheel balancing to fine tune your fitment and remove as much rubbing as possible.
Tell us about your new wheels! Leave a comment below.
Feature Image: Front fender rolling by George, modified by Low Offset, CC BY 2.0


3 comments
What if your trying to lift a car and fit wider and bigger wheels, can you cut out the fender and then pull into get that same shape that it had before?
Adding heat has ZERO effect on rolling fenders, but you are correct: going very slow and increments at a time are the best practices.
Is there any way to roll ABS plastic fenders in order to make them wider?