Considering the enormous amount of adjustability that coilovers offer, they can either be a blessing or a nightmare depending on how you set them up.
A few clicks and twists here and there can dramatically change the handling characteristics and ride height of your car.
But unless you know exactly what you’re doing, it is recommended to not change the factory settings of your coilovers.
Note that all coilovers come with preset adjustments that most people are okay with, but some find them too aggressive for daily driving.
If the factory settings don’t work for you, we recommend changing these settings by yourself. And to do that, you’re going to want to know how to fine-tune your preload and damping adjustments.
In this article, we’ll discuss what preload is, how it works, and how you can adjust it by yourself.
Coilover Preload Explained
In simple words, preload is nothing more than the pressure that’s applied to the spring before the load of your car compresses it. When adjusting preload, you are simply adding (or removing) weight to (or from) a fully extended shock for optimum suspension travel.

Understanding preload will get a lot easier if you know how spring rates work.
Spring rate is the amount of weight required to compress the spring for one unit distance. For example, a 10k spring rate means 10 kilograms are needed for 1 mm of compression.
Now let’s say you add 20 kg of preload on a 10k spring — that’s 2 mm of compression.
The first 20 kg load won’t compress the spring at all, but any more than that will compress the spring. When you drive over a pothole or a bump, for example, effectively exerting a load of more than 20 kg. Anything less than that would simply not activate your suspension.

If the preload is too less, you’ll run the risk of damaging your springs as a result of them being all loose and not seated properly.
That said, having too much preload isn’t good either. Especially if the preload is more than the weight of your car at each corner. In this case, the car’s weight (when it is stationary) will not compress the springs at all, resulting in a harsher ride.
Preload also significantly impacts the bump and droop travel of your damper:
- More preload = more bump travel and less droop travel
- Less preload = less bump travel and more droop travel
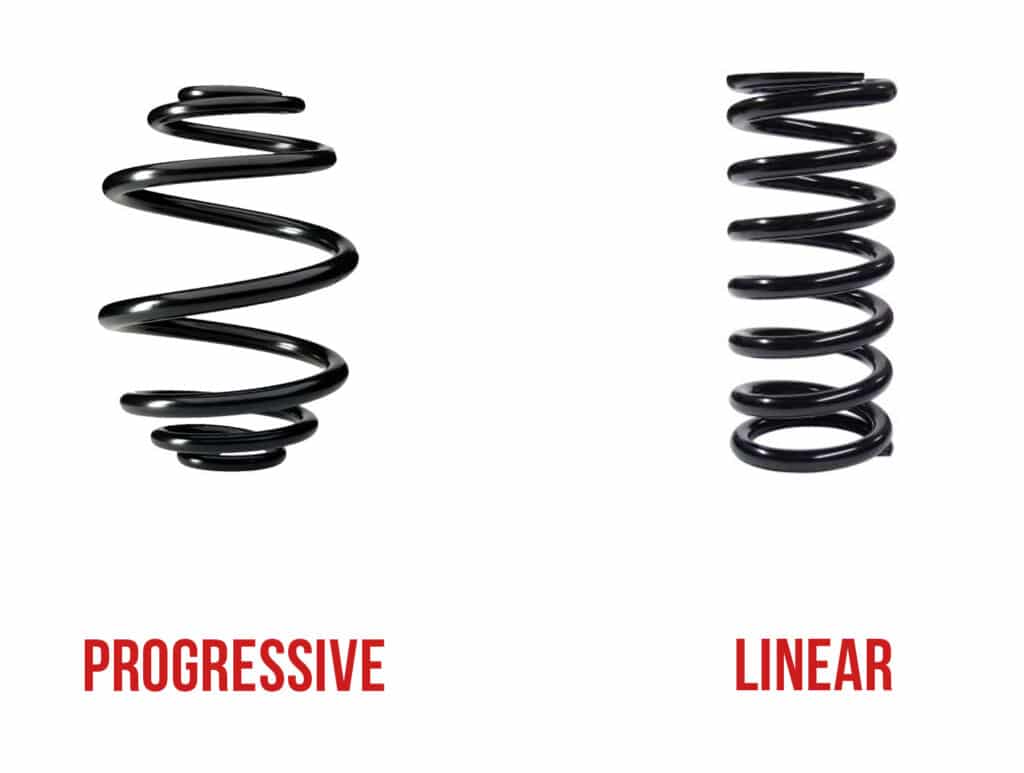
There’s a common myth that preload alters spring rate and stiffness — let’s clear the air here. Unless the spring is progressive, adding preload will not affect the spring rate or the handling characteristics of the car. Unless you’re at the extreme ends of the spectrum.

Considering how most aftermarket coilovers have linear springs, increasing preload will not make them stiff or soft.
This is why you’ll often hear experts saying things like “preload doesn’t really exist when it comes to linear springs”
The only reason why you feel that your suspension might be getting stiffer after increasing preload is that the springs aren’t getting compressed optimally. This has nothing to do with the actual spring rate.
Think about it — if you have 10k springs with 0 preload vs the same springs with 20 kg of preload, the spring will effectively compress the same amount when you add the weight of your car.
Note: if these units of measurement sound foreign to you, they may well be! Read our spring rate conversion guide to swap them to lb/in with ease.
Why Preload Is So Important
Optimally preloading your coilovers reduces the chances of the spring completely unseating and losing composure. It’s vital to prevent the spring from unloading and going off-center.
Another reason why it’s important is that all springs are designed to operate under a certain preload.

It’s worth noting that spring extension is equally important as compression.
Spring preload pushes the wheel down and makes the suspension do its job better. On big bumps, the suspension preload pushes the tires down (droop travel) so they can better follow the terrain and make for a smoother ride.
How to Adjust Coilover Preload
The steps involved in adjusting preload on your coilovers depend on whether you have fully threaded or partially threaded coilovers.
Fully threaded coilovers offer independent ride height adjustment — something that suspension purists dislike for very valid reasons.
In this example, we’ll be referring to partially threaded coilovers that do not offer independent ride height adjustment.
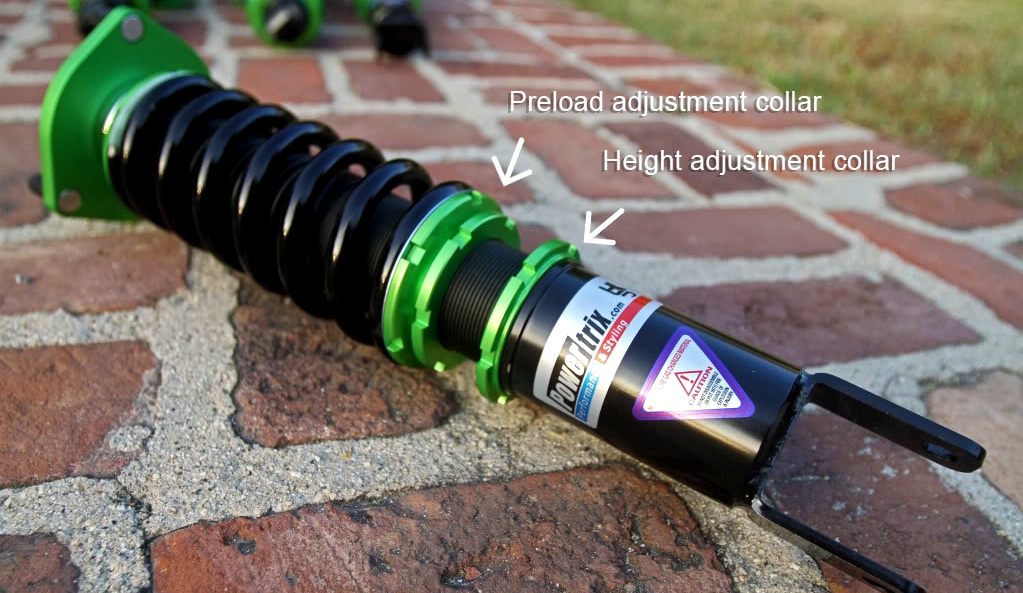
Most partially threaded coilovers offer the option of adjusting preload using the two locking rings located on the lower perch.

With that out of the way, let’s get into adjusting the preload.
- Ideally, preload should be adjusted before installing coilovers. You can replicate the same adjustments on all four coilovers but we recommend corner balancing your car and setting the preload accordingly.
- You can also adjust the preload after the coilovers are installed. To do this, you need to jack up your car and remove the wheels to expose the strut assembly.
- Locate the coilover’s upper perch and loosen the lock ring it by unwinding it using the spanner keys provided by the manufacturer.
- At this point, the spring should be loose enough to move around.
- Now, tighten the upper perch to a point where the spring is snugly sandwiched between the upper and lower locking rings. This is zero preload. (You could just leave the preload at 0 if you’re only going to drive on the streets, just make sure that the spring is adequately tight).
- After this, start tightening the lower locking ring. The process of adding preload starts from this point on.
- Now focus only on the lower perch. Using the spanner key, tighten the upper ring (on the lower perch) and make sure the lower locking ring remains undisturbed. Because if it moves around, you’ll have to start all over again.
- Measure the distance between the top of the lower lock ring and the bottom of the upper ring. This distance represents your preload. For example, if the spring rate is 10k and you wound the spring by 4mm, you’ve added 40 kilograms of preload.
- Alternatively, you can measure the total length of the spring to determine preload. If the unsprung length of the spring is 180mm, it should measure 176mm with 4mm of preload.
- Some manufacturers recommend using the spanner key’s width as a measurement. In this case, tighten the upper perch until the spanner key sits comfortably between the upper and lower rings.
- Once the desired preload is set, make sure to tighten the lower lock ring.

Closing Thoughts
There are infinite possibilities when it comes to tuning your suspension. What works and what doesn’t depends on what you plan on doing with your car, your preferences, and the car itself.
Just be mindful of the changes that come about in your suspension geometry when you start changing the lengths and angles of your suspension components.
How much preload do you have on your coilovers? Let us know by leaving a comment below!


4 comments
We used to race sports sedans
We made this jig to hook the edge of rim lever down
Utill u get same reading on dial slip bit of paper under tyre like a feeler gauge as it depends on what’s were around car there all different the jig is part of a valve spring tester if that helps u understand
This is what me myself has learned from all this experience throw out my time
I liked the explanation on loading the coil over on the car. I was able to get the load to zero or factory setting.
My question now is how to get the load to zero or factory on the rear setup which is a divorced coil over?
Your explanation on coil overs was very helpful in me understanding more about them.
Thank you
I just bought these maxpeedingrods coilovers and I need help setting up the preload. I have a 1999 acura integra ls coupe.
What the best preload for a 2020 Subaru Crosstrack? My front spring rate is 7kg, rear is 6kg.