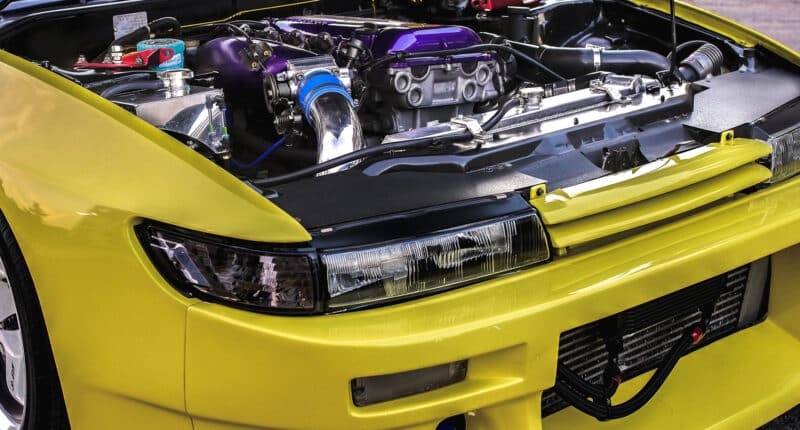
Heat is the single biggest enemy of performance, especially when it comes to forced induction.
If your intake charge temperature isn’t regulated and lowered, it will sap a ton of power and lower the overall efficiency of your engine.
Regardless of whether you have a turbocharger or supercharger installed, the hot and compressed air being forced into your engine needs to be appropriately cooled before it enters the combustion chamber.
That’s exactly what intercoolers help with.
With an intercooler installed, you can significantly lower the intake charge temperature, prevent unnecessary damage, and free up lost power.
But installing one of these is a lot easier said than done. It begins with knowing how it works, what the different types are, and which one to choose for your particular application. That’s what we’ll discuss in this guide.
What Does an Intercooler Do?
Intercoolers are air intake cooling devices that are commonly used on engines fitted with some form of forced induction.
They work just like radiators do, and that’s why the two components look so similar. There are passageways for the warm air to pass through, and there’s a heat exchanger — a system used to transfer heat.
Let’s take a closer look at what goes on inside an intercooler when it’s in active use.
How Does an Intercooler Work?
The supercharger vs. turbocharger debate is a hot topic. Though the two work very differently from one another, they pretty much do the same thing: force large amounts of air into the engine to make more power.
Heat is an inevitable part of air compression. No matter how advanced your turbo or supercharger is, without an intercooler, the compressed air that it generates will carry a lot of heat with it.
An intercooler’s primary function is to cool down that warm air before it reaches the combustion chamber.
Wondering why you need the intake air temperature to be lower? The cooler the air, the denser it is. This means it carries more oxygen — something you need to ensure proper combustion.

When the intake charge is less dense, it doesn’t mix and burn with the fuel properly.
This negatively affects the air-fuel ratio and creates a domino effect of various other problems like detonation, excessive fuel consumption, and loss of volumetric efficiency.
That’s why it’s best to do everything you can to cool down the air from the exhaust system before your turbo pumps it back into the cylinder.
Arguably, intercoolers are far more necessary on turbochargers considering how they depend on the exhaust stream to spin the turbine wheel. But they’re equally important for supercharged engines as well.

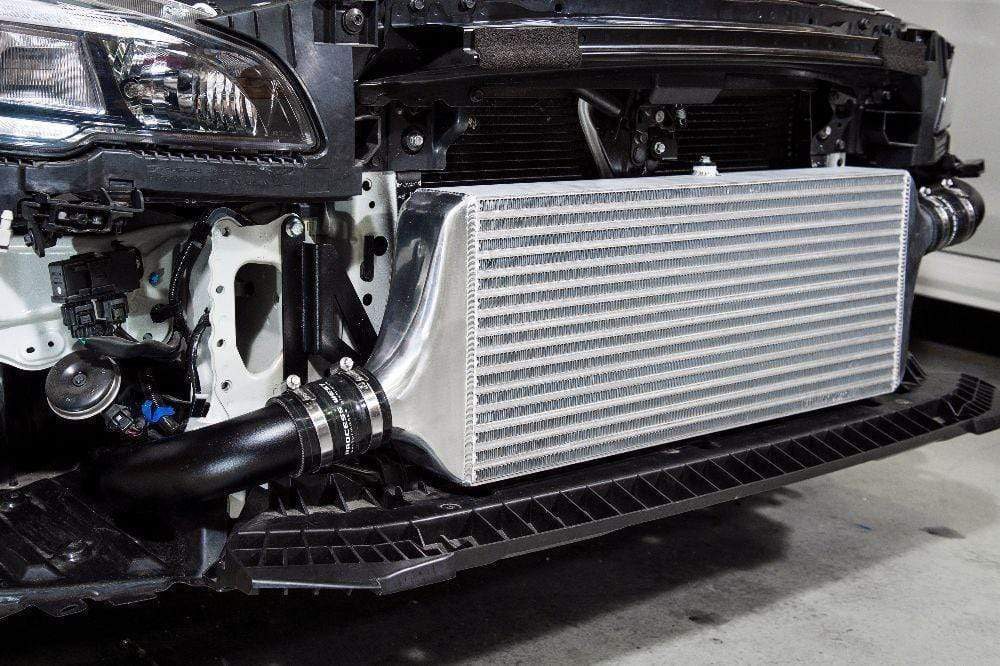
The intercooler kicks into action the moment you start your car. Follow the airflow path and you’ll see exactly what goes on under the hood. Let’s consider the airflow path of a turbocharged engine for instance.
Initially, the first charge travels through the intake tract and into the cylinder where it mixes with fuel, gets compressed, burns, and converts to exhaust.
It is then pushed out through the exhaust valve and into the exhaust manifold. Some of this exhaust is then sent into the turbo where it spins the turbine wheel and the compressor wheel as a result.
What you then get is compressed air which passes through a discharge port and heads straight into the intercooler, where it cools down.
After that, it flows back into the manifold, where it makes its way back into the cylinder, and the cycle continues.
Types of Intercoolers
Now that you know what the turbo intercooler does, let’s get a better understanding of how the different types of intercooled turbos work.
There are two main types: air-to-air and liquid-to-air. The main difference between the two is the heat transfer agent they use.
Air-to-air intercoolers rely on ambient air to cool down the warm air, while water-to-air intercoolers rely on water to do the same. Below we’ve explained how both these types function.
Air-to-Air Intercooler
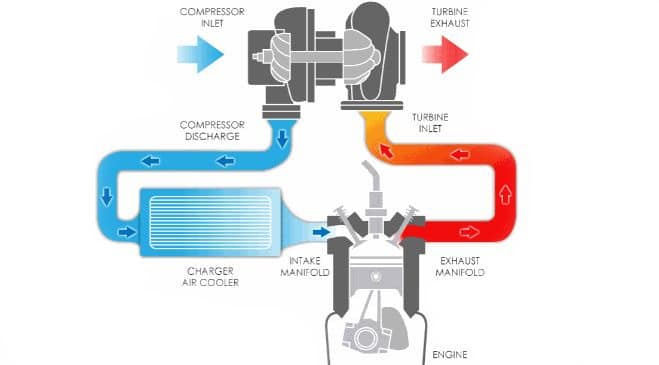
Air-to-air intercoolers are typically mounted on the front of the engine bay, right behind the front bumper for better accessibility to outside air.
They’re very commonly used; they’re cheaper, lighter, and simpler in contrast to air-to-water intercoolers.
The only drawback of this intercooler type is the longer intake length. Because of the way they’re mounted, more tubing is required, and it takes much longer for the air to travel from the turbocharger to the engine.
This often results in wider fluctuations in temperature. Heat soak, when stationary, can also be a problem as they rely on ambient airflow generated as a result of the vehicle being in motion.
The engine fan assists with the cooling in this situation, but it can only do so much.
In terms of core design, there are two options you can choose from: tube-and-fin, or bar-and-plate.
Tube and Fin
Tube-and-fin intercoolers are made up of a network of a passage of tubes called “passes” and cooling fins — the wave-like metal structures that form a mesh by spanning across the front surface of the intercooler.
Compressed air travels through the tubes which are connected to a series of fins. When the vehicle is in motion, the ambient air hits these fins and cools down the hot air as a result.
This design is more commonly seen on cheaper stock and OEM-replacement intercoolers.
Bar and Plate
Bar-and-plate intercoolers are stronger, heavier, and more expensive. But, they provide better heat dissipation and cooling characteristics.
They comprise a series of plates and bars welded together to make channels for the hot air to flow through. Together, they do the job of a heat sink.
These types of intercoolers are a lot more durable and can take more abuse compared to the tube-and-fin design.
Water-to-Air Intercooler
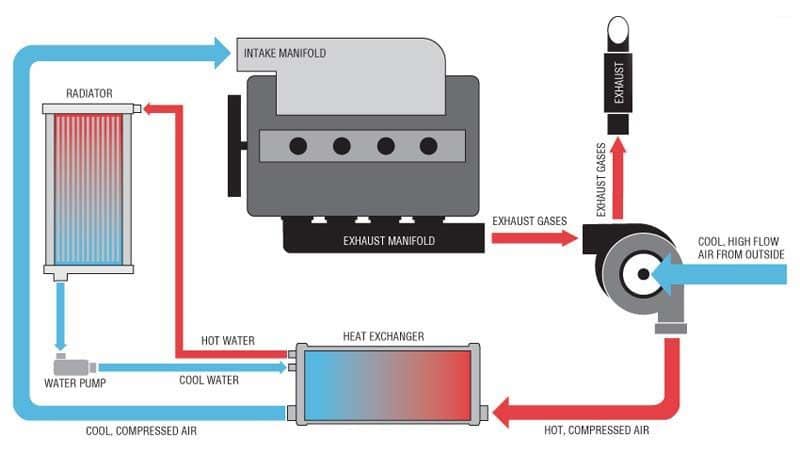
Water-to-air intercoolers are also called liquid-to-air or charge air coolers. The primary heat transfer agent in this design is either water or coolant.
As the hot air is circulated through the intercooler, heat is transferred from it to the coolant that passes through adjacent passages, cooling the air down as a result.
The cooled air is channeled into the engine, and the water goes into a separate radiator as it needs to be cooled after absorbing heat from the compressed air.
Water-to-air intercoolers are perfect for smaller, cramped engine bays owing to their compact size.
They’re also more expensive to manufacture and require the use of additional complex components such as an auxiliary radiator, a thermostat, extra piping, a water reservoir, and a water pump.
There are more components to this system which leads to a higher price tag, but it’s certainly more efficient.
This increased efficiency is why the liquid-to-air intercooler is growing in popularity as more and more drivers try to get the most out of the engines.
Choosing the Right Intercooler
Now that you know the basics of what intercoolers are and how they work, let’s take a closer look at some of the considerations you need to make when choosing one for your car.
Below we’ll discuss the impact of intercooler size, fin density, mounting location, and pressure drop.
Size
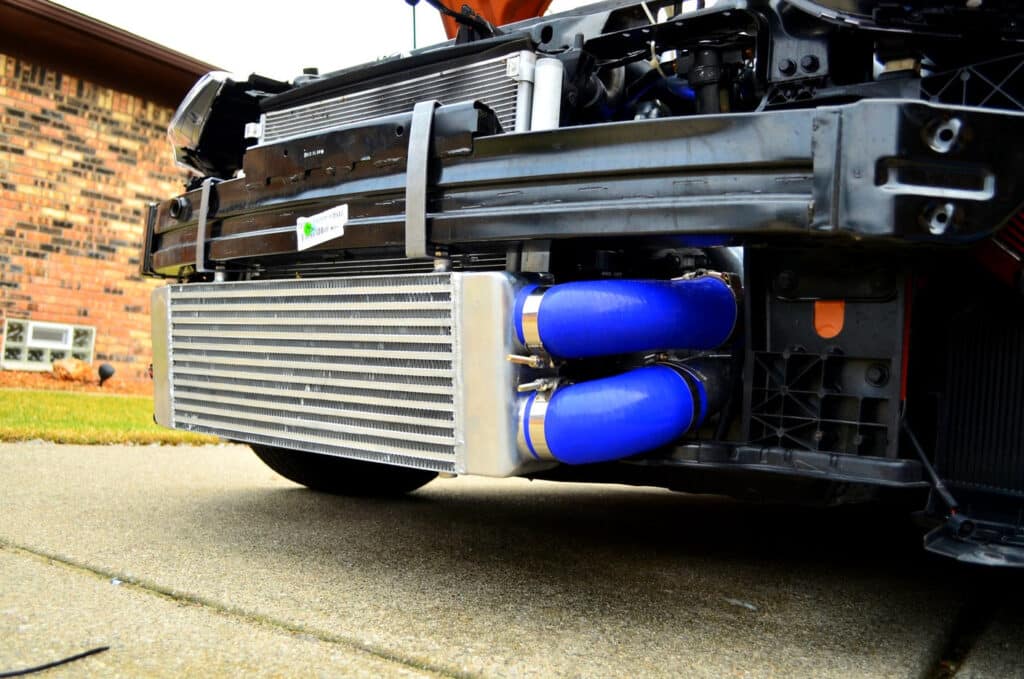
When selecting an intercooler, it’s important to choose a size that is appropriate for the amount of boost you intend to run.
You don’t want to use an intercooler that’s bigger than you need because you’ll lose pressure as the air travels from the inlet to the outlet.
Choose too big of a core size and you’ll end up with more lag. 3” to 3.5” is standard for most street cars.
Selecting the right Inlet and outlet size is also important. Though they’re usually the same in most aftermarket intercoolers, some manufacturers provide varying inlet and outlet sizes for high-boost applications. This helps to control the pressure drop.
An inlet of 2.5” and outlet of 3.5” or even 4” to 4.5” is commonplace for high boost applications.
Pressure Drop
Pressure drop is the difference between the air pressure at the inlet and the outlet of the intercooler.
Ideally, you want a low-pressure drop somewhere in the range of 1 or 1.5 psi and lower. Anything more than 3 psi is considered inefficient.
Well-designed intercoolers can achieve the right fin density, and the right size, while still keeping the drop at an acceptable level, without putting too much stress on the turbo.
Fin Density
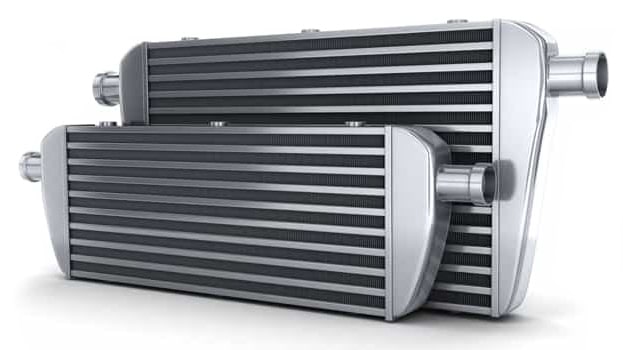
Fin density is typically measured by calculating the number of fins per inch, also called FPI. This isn’t something you can measure by yourself, and this information can only be found on the manufacturer’s website.
The higher the fin density, the more air can be trapped in the fins, and the more effective the overall cooling will be. However, the more fins you have in your charge path, the more restricted the airflow will be.
Aftermarket intercooler manufacturers strive to achieve the perfect balance between optimal airflow and cooling by carefully engineering the right fin density.
Mounting Point
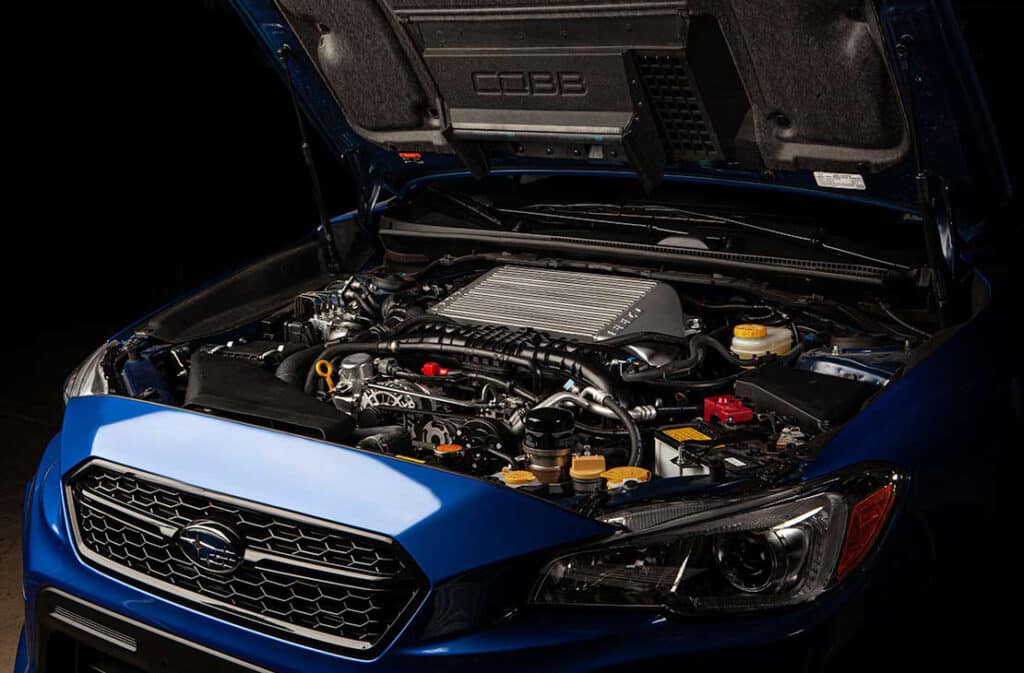
When it comes to mounting your intercooler, there are two viable options — either on the top of the engine or right behind the front bumper. These are called top-mount and front-mount intercoolers, respectively.
Both mounting options are ideal for cooling down the compressed air, but if you’re looking to install an aftermarket intercooler and can’t decide on where to mount it, then we recommend going with a top-mounted intercooler.
Firstly, air needs to travel a shorter distance to reach the intercooler if it is top-mounted, resulting in reduced turbo lag. Secondly, this mounting option utilizes engine bay space effectively and leads to better heat dispersion.
But while a top-mounted intercooler might be the preferred mounting location on paper, it’s worth questioning whether front-mounted ones are any good in the real world.
The short answer is yes. In fact, in daily driving conditions, you won’t be able to tell the difference between the two systems because they’re so comparable.
But if you’re measuring the efficiency of each system and trying to figure out the exact horsepower and turbo-lag time, the top-mounted intercooler has the advantage every time.
Cool It

Even though an intercooler is not mandatory for forced induction, it’s always advisable that you install one.
It’s worth mentioning that your experience with installing one of these will differ based on your engine layout.
For cars that have a front-mounted engine, the process is quite straightforward. But for mid or rear-engine cars, expect to deal with a more complicated setup.
What’s your intercooler setup of choice? Let us know by leaving a comment below!
